
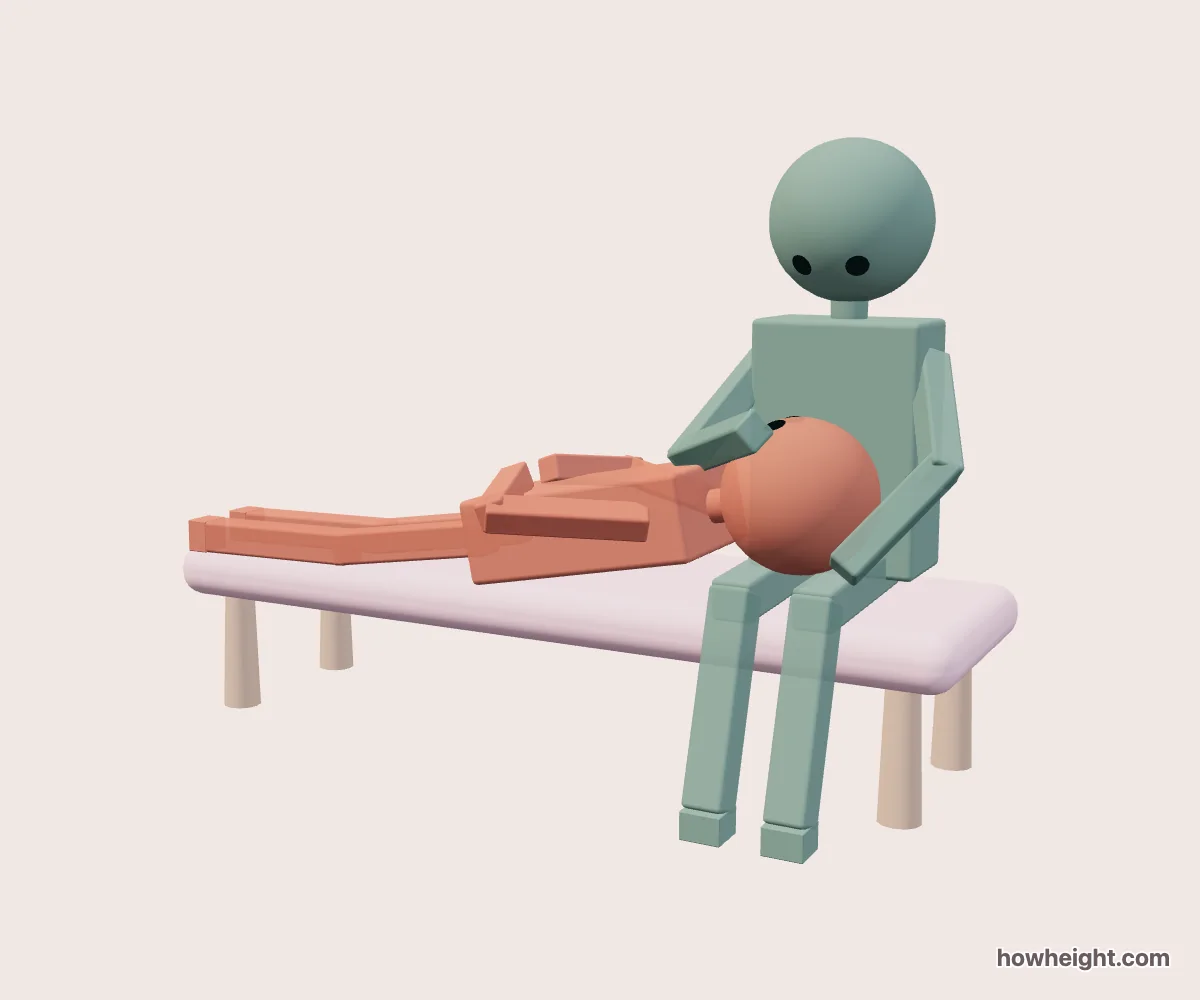
Place the seated character before the resting head
A lap pillow pose begins with one character sitting while the other rests their head in that person’s lap. Unlike a standing height comparison, much of the second character extends sideways across the scene. The important relationships are the resting head, the seated torso, the seat, and the legs. This tool helps you inspect those shapes together in a simplified 3D reference.
Choose Offering a lap to select the seated character. The other person becomes the one resting. Names and contrasting colors are useful because the resting head, the seated hands, and the upper legs can overlap in a small area.
For a lap pillow drawing, the head position is often the first detail that attracts attention. It is still worth starting with a wider view. If the seat and torso directions are unclear, a close image of the head alone will not explain how the rest of the pose fits together. Establish that structure before selecting a more intimate crop in your finished artwork.
Stretched out and Knees relaxed change the silhouette
Stretched out gives the resting character a longer silhouette across the scene. Look along the body from the head through the hips and toward the feet. This preset is useful when you need to understand the horizontal space occupied by the pose. A front view can make that length apparent, while a turn toward the feet may shorten it sharply through perspective.
Knees relaxed changes the leg arrangement into a more compact shape. Compare it without changing the seated character or the two heights. Check which knee becomes nearest the camera, how much of the torso stays visible, and whether the leg shape hides the seat edge.
Resting side switches the direction in which the lying character extends. Use it to compare compositions with the feet toward one side or the other.
Compare the seat with the ground and the resting head
Seat height is adjustable from 25 to 65 cm, with 40 cm as the default setting. The seat is an important reference plane because it connects the seated body to the resting arrangement. Start at the default, locate the seat edge, and then compare a lower and higher setting while keeping the characters unchanged. Inspect the relationship to the ground as well as the head in the lap.
Compare the length of the resting figure
Start with a seated character at 170 cm and a resting character at 165 cm, using the 40 cm seat. In the overview, identify the head contact, the seated torso, and the horizontal direction of the resting body. This gives you a reference arrangement before exploring a more pronounced difference.
Keep the seated character at 170 cm and change the resting character to 185 cm. Watch how much of the composition is occupied by the torso and legs rather than comparing only the heads. The preview may reframe the whole scene as its bounds change, so judge the figures against one another instead of treating their size on the screen as a measurement.
Now swap roles. The previously resting person becomes the seated person, and the original seated figure lies across the scene. Check the support area again rather than assuming the first image has simply been turned around. Role reversal changes which proportions are sitting and which extend horizontally.
Use the side view to uncover the layers around the head
In a lap pillow reference, several surfaces meet near the focal point. The resting head overlaps the seated legs, and hands or forearms may add another layer. A front-facing picture can compress all of these into a small cluster. Turn the scene to identify which shapes are in front, then return to the composition you intend to use.
Check the head-to-torso connection of the resting character. A shoulder hidden behind the seat edge or another arm can make the head appear detached in a small image. A slightly higher or more diagonal view may expose enough of that connection to clarify the pose. Use manual rotation to compare, rather than changing the heights just to solve a camera overlap.
The two character views offer a different reading of the same arrangement. The seated viewpoint can look toward the resting figure, while the other viewpoint starts near the lying model’s eye position.
Sketch the seat, torso, and resting line in that order
Block in the seat as a plane, then place the seated torso above it. Add the resting head and continue a broad line through that character’s body toward the legs. Only after those relationships are clear should you refine the arms and knees. This order helps keep the resting figure connected to the lap instead of drawing two separately attractive poses that do not fit together.
If the intended artwork includes a sofa, clothing folds, or long hair, add them around the structure rather than assuming the preview has already accounted for their volume. A hairstyle can obscure the head contact, and loose fabric can hide the edge of the lap.
Leave room for the feet when saving a full reference. A portrait canvas may make the horizontally extended pose appear smaller than a square one because the complete arrangement must fit.